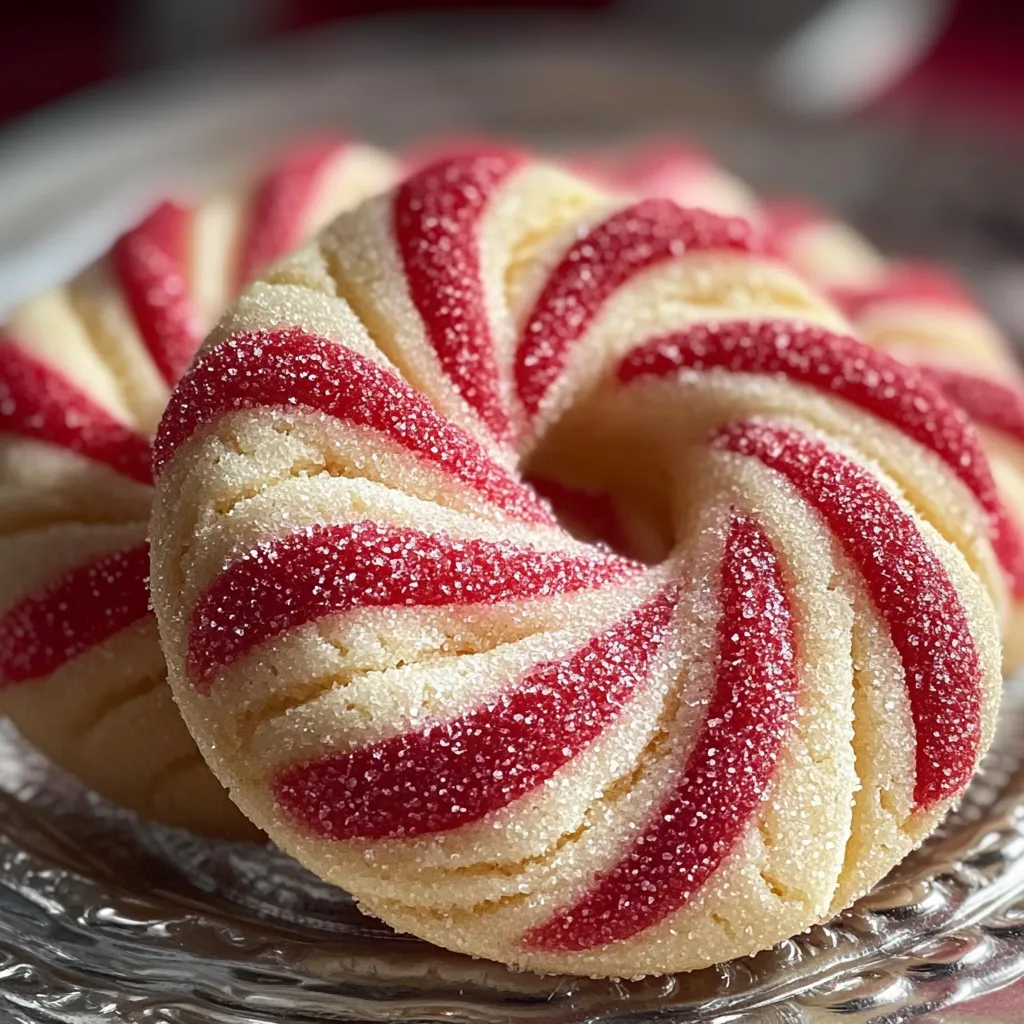
There’s something undeniably magical about holiday baking—the familiar scents of butter, sugar, and peppermint filling the kitchen, hands dusted with flour, and trays of cookies cooling on the counter. Magic of Candy Cane Cookies capture that holiday spirit perfectly. With their iconic red-and-white twist and refreshing peppermint flavor, these cookies are as beautiful as they are delicious.
Candy cane cookies have long been a holiday tradition in many homes, often made during December as part of festive cookie trays or family baking days. Their charm lies not only in their appearance but also in their balance of flavors—buttery vanilla dough paired with cool peppermint creates a nostalgic taste that instantly feels like Christmas. These cookies are especially fun to make with kids or loved ones, thanks to the twisting and shaping process that feels more like crafting than baking.
Whether you’re baking for gift boxes, cookie swaps, or simply to enjoy with a warm cup of cocoa, this recipe delivers soft, tender cookies that look impressive without being overly complicated. Let’s explore how to make these festive treats step by step.
Recipe Overview
Magic of Candy Cane Cookies are classic holiday butter cookies flavored with vanilla and peppermint, shaped into festive candy canes using red and white dough. Lightly crisp on the outside and tender on the inside, these cookies are perfect for holiday platters, gifting, and seasonal celebrations.
Ingredients & Instructions
This recipe uses simple pantry staples and a touch of food coloring to create its signature look.
Ingredients
- 1 cup unsalted butter, softened
- 1 cup powdered sugar
- 1 large egg
- 1 teaspoon vanilla extract
- ½ teaspoon peppermint extract
- 2½ cups all-purpose flour
- ½ teaspoon salt
- Red gel food coloring
Step-by-Step Instructions
1. Cream the Butter and Sugar
In a large mixing bowl, beat the softened butter and powdered sugar together until smooth, light, and fluffy. This step is key for creating tender cookies with a delicate crumb.
2. Add Wet Ingredients
Mix in the egg, vanilla extract, and peppermint extract until fully combined. The vanilla softens the peppermint flavor, keeping it festive without being overpowering.
Tip: Peppermint extract is strong—measure carefully to avoid overwhelming the cookie.
3. Incorporate Dry Ingredients
In a separate bowl, whisk together the flour and salt. Gradually add the dry mixture to the butter mixture, mixing just until a soft dough forms. Avoid overmixing to keep the cookies tender.
4. Color the Dough
Divide the dough evenly into two portions. Leave one portion plain. Add red gel food coloring to the other half and mix until the color is evenly distributed.
Tip: Gel food coloring works best because it delivers vibrant color without changing the dough’s texture.
5. Chill the Dough
Wrap both dough portions in plastic wrap and chill until firm enough to handle, about 30–45 minutes. Chilling helps the dough hold its shape during baking.
6. Preheat and Prepare
Preheat your oven to 180°C (350°F) and line baking sheets with parchment paper.
7. Shape the Cookies
Pinch off equal portions of red and white dough. Roll each into thin ropes, place them side by side, and gently twist together. Curve the twisted dough into classic candy cane shapes.
8. Bake
Place the shaped cookies onto the prepared baking sheets, spacing them slightly apart. Bake until the cookies are set but not browned, about 8–10 minutes.
9. Cool
Allow the cookies to cool on the baking trays for a few minutes before transferring them to a wire rack. Cooling helps them firm up while maintaining a soft texture.
Baking Tips & Variations
Candy cane cookies are simple, but a few tweaks can make them even more special.
1. Flavor Variations
- Swap peppermint extract for almond extract for a different holiday flavor.
- Add a touch of orange zest for a fresh citrus twist.
2. Decorative Touches
- Sprinkle crushed candy canes lightly on top before baking.
- Dip cooled cookies halfway into melted white chocolate and let them set.
3. Dough Handling Tips
- If the dough becomes too soft while shaping, return it to the refrigerator for a few minutes.
- Keep dough portions covered to prevent drying out.
4. Make Ahead
- Dough can be prepared and refrigerated up to 2 days in advance.
- Baked cookies freeze well for up to 2 months, making holiday prep easier.
Storage & Serving Suggestions
Storage
- Store cookies in an airtight container at room temperature for up to 7 days.
- Separate layers with parchment paper to preserve their shape.
Serving Ideas
- Serve with hot chocolate, coffee, or peppermint tea.
- Add to holiday cookie platters alongside shortbread, sugar cookies, or gingerbread.
- Package in festive tins or bags for edible holiday gifts.
The Magic of Candy Cane Cookies lies in their ability to combine tradition, flavor, and festive beauty in one delightful treat. Their soft texture, balanced peppermint flavor, and iconic candy cane shape make them a holiday baking essential year after year.
Whether you’re continuing a family tradition or starting a new one, these cookies bring warmth, joy, and a touch of holiday magic to any celebration. Simple to make and joyful to share, they’re a reminder that the best holiday moments often begin in the kitchen.
FAQs
1. Can I make these cookies ahead of time?
Yes. The dough can be chilled for up to two days, or the baked cookies can be frozen.
2. Why shouldn’t the cookies brown?
These are butter cookies meant to stay light in color for the best texture and appearance.
3. Can I skip food coloring?
Absolutely. You’ll still get delicious peppermint cookies, just without the classic candy cane look.
4. How strong is the peppermint flavor?
It’s balanced and mild, but you can adjust the extract slightly to taste.
5. Can kids help make these cookies?
Yes! Twisting and shaping the dough is fun and kid-friendly.
Festive Magic of Candy Cane Cookies made with buttery dough, vanilla, and peppermint. Beautiful red-and-white holiday cookies perfect for gifting and celebrations.