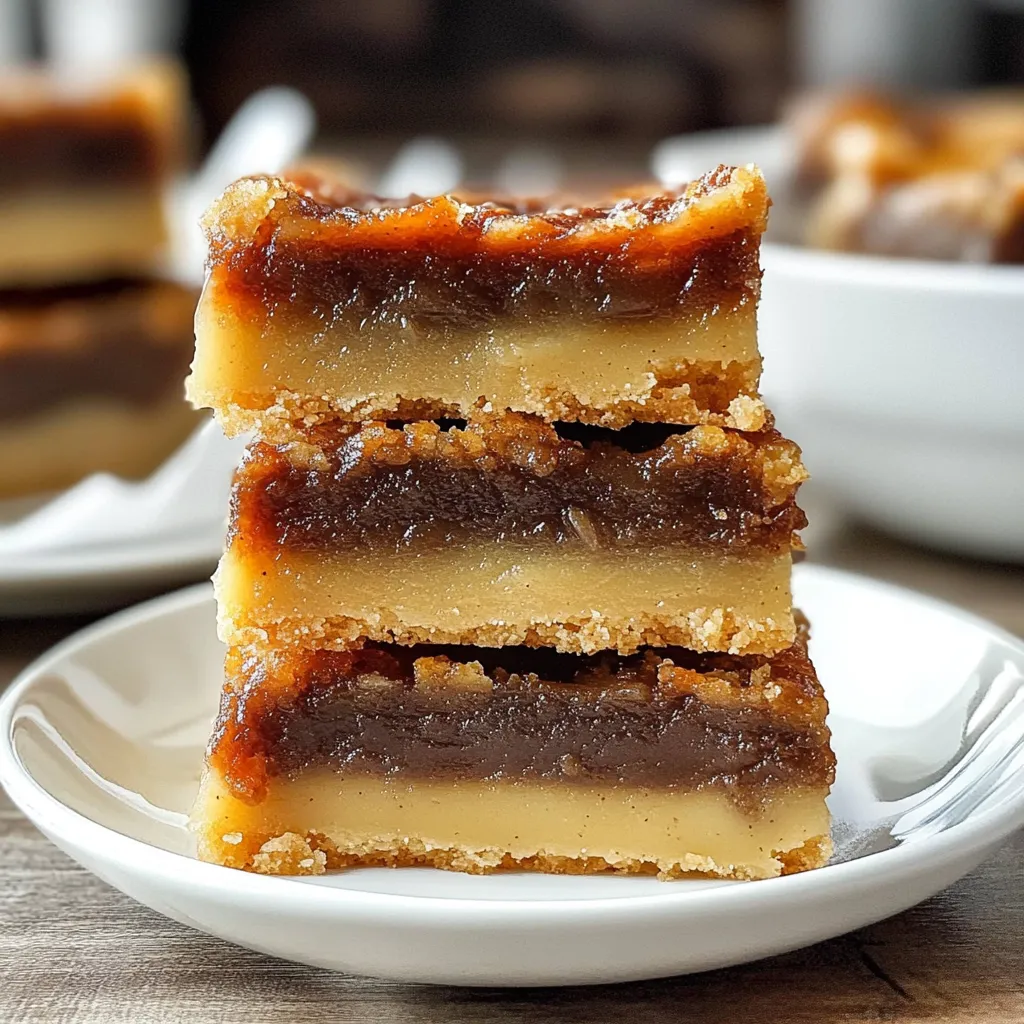
Few desserts capture the nostalgic charm of Canadian baking quite like Butter Tarts—gooey, buttery, and perfectly sweet. But when you turn that classic treat into Butter Tart Squares, you get all the same indulgent flavor with half the effort. No fiddling with pastry shells, no delicate tart cups—just one buttery shortbread crust topped with a rich, caramel-like filling that melts in your mouth.
These bars are perfect for any occasion—holiday dessert tables, afternoon coffee breaks, or when you simply want something sweet and homemade. The soft, chewy filling balances beautifully atop a tender, crumbly base, creating that signature buttery contrast that makes each bite irresistible. Best of all, they store well and cut cleanly, making them ideal for sharing (though you might just keep them all for yourself!).
Recipe Overview
Butter Tart Squares are a simplified version of the traditional butter tart, featuring a shortbread-style crust and a luscious, sweet filling. The combination of buttery richness and caramelized flavor creates an indulgent dessert that’s both rustic and elegant. With a few basic pantry ingredients and about an hour of time, you can bake up a tray of these golden, gooey squares that taste like a cozy Canadian classic.
Ingredients & Instructions
Let’s walk through this step-by-step guide to baking the perfect batch of Butter Tart Squares.
Ingredients
For the Base Layer
- 1 cup unsalted butter, softened
- ½ cup powdered sugar
- 2¼ cups all-purpose flour
For the Butter Tart Filling
- ½ cup unsalted butter, softened
- 1 cup brown sugar (light or dark)
- 2 tablespoons all-purpose flour
- 4 large eggs
- 2 teaspoons vanilla extract
- ¾ cup dark corn syrup
- 2 tablespoons white vinegar
- 1 cup raisins, currants, or chopped walnuts (optional — or try ½ cup currants + ½ cup walnuts)
Instructions
1. Preheat & Prepare
Preheat your oven to 350°F (175°C). Line a 9×13-inch baking pan with parchment paper, leaving a slight overhang on the sides—this makes lifting and slicing a breeze later on.
2. Make the Shortbread Base
In a large mixing bowl, beat the butter and powdered sugar together until fluffy and pale. Add the flour, mixing until the dough comes together—it should be thick and slightly crumbly.
Press the mixture firmly and evenly into the prepared baking pan, smoothing out the surface with your fingertips or the back of a spoon.
Bake for 15–20 minutes, until the crust looks set and lightly golden. This layer creates that signature buttery base that balances the sweetness of the filling. Leave the oven on while preparing the next layer.
Tip: Don’t overbake the crust—you want it pale golden, not brown, so it stays tender and crumbly beneath the filling.
3. Prepare the Butter Tart Filling
While the crust bakes, beat the butter, brown sugar, and flour together in a large bowl until smooth. The flour helps the filling thicken as it bakes.
Add the eggs and vanilla extract, whisking until well combined. Then, pour in the dark corn syrup and white vinegar—these two ingredients give butter tarts their signature glossy, caramel-like texture with just a touch of tang to cut through the sweetness.
Stir in raisins, currants, or chopped walnuts if desired. Each option adds a different twist—raisins give chewiness, currants add subtle tartness, and walnuts bring a lovely crunch.
4. Combine and Bake
Pour the filling mixture evenly over the warm baked crust, using a spatula to spread it gently to the edges.
Return the pan to the oven and bake for 30–35 minutes, or until the top looks set and slightly golden. The filling should no longer jiggle when you nudge the pan.
Pro Tip: The center should be just firm when touched—slightly sticky is fine, but not liquid. It will continue to set as it cools.
5. Cool and Slice
Remove from the oven and let the pan cool completely on a wire rack. This step is key—the filling will firm up as it cools, making it much easier to slice.
Once cooled, lift the dessert out using the parchment paper overhang and place it on a cutting board. Use a sharp knife to cut into squares or rectangles, wiping the blade clean between cuts for neat edges.
Cooking Tips & Variations
1. Texture Customization
If you love a classic gooey center, slightly underbake the filling (about 30 minutes). For firmer bars that travel well, bake closer to 35 minutes.
2. Flavor Twists
- Maple Syrup Touch: Replace ¼ cup of the corn syrup with pure maple syrup for a more Canadian flavor profile.
- Bourbon or Rum Kick: Add a tablespoon of bourbon or dark rum for a subtle depth and aroma.
- Coconut Flair: Mix in ½ cup shredded coconut for a tropical sweetness.
3. Nut and Fruit Options
While raisins and currants are traditional, you can experiment:
- Pecans or walnuts for crunch
- Dried cranberries for tart contrast
- Chocolate chips for a sweeter modern take
4. Gluten-Free Option
Use a 1:1 gluten-free flour blend for both the crust and filling, and ensure your powdered sugar and corn syrup are gluten-free certified.
5. Serving Warm
If you love butter tarts warm and gooey, gently reheat individual squares for a few seconds in the microwave before serving—especially delightful with a scoop of vanilla ice cream or a drizzle of caramel sauce.
Storage & Serving Suggestions
Storage
- Room Temperature: Store in an airtight container for up to 3 days.
- Refrigerator: Keeps for up to 1 week—just let them come to room temperature before serving for the best texture.
- Freezer: Wrap tightly and freeze for up to 3 months. Thaw overnight in the fridge or at room temperature before enjoying.
Serving
Serve these squares as a delightful tea-time treat, a holiday dessert, or a sweet potluck contribution. Their buttery aroma and golden filling pair beautifully with coffee, black tea, or even a splash of cold milk.
Butter Tart Squares are the perfect way to enjoy the flavor of traditional butter tarts without the fuss. With a melt-in-your-mouth crust and a luscious, golden filling that strikes just the right balance of sweet and buttery, these bars deliver pure comfort in every bite.
Whether you’re baking for a special occasion or just craving something cozy, this recipe promises a crowd-pleasing dessert that feels homemade in the best possible way. Once you’ve made these, they’ll become a staple in your kitchen—a timeless favorite you’ll want to share again and again.
FAQs
1. Can I use maple syrup instead of corn syrup?
Yes! You can replace part (or all) of the corn syrup with maple syrup for a more natural, distinctly Canadian flavor.
2. How do I know when the filling is done?
The top should be set and lightly golden, and the filling should no longer jiggle when the pan is gently nudged.
3. Can I make Butter Tart Squares ahead of time?
Absolutely. They keep beautifully for several days and can even be frozen for up to three months.
4. What’s the best way to cut clean squares?
Cool completely, lift the slab out with parchment paper, and use a sharp knife—wiping between each cut.
5. Can I make them nut-free?
Yes! Simply omit the nuts or replace them with dried fruit like raisins or cranberries.
Indulge in rich, gooey Butter Tart Squares with a buttery crust and caramel-like filling. A classic Canadian dessert made easy—perfect for any sweet occasion!